- Two yards of blue marine vinyl – 16.99
- Four 2″ metal D rings
- Three yards of 2″ black nylon webbing
- 2/3 yards of 1″ black sew-on velcro (non-adhesive)
- 1/3 yards of 2″ black sew-on velcro (non-adhesive)
- Dritz Fray Check
- Ziplock bags
- Sand
I designed the pattern so that the bottom of the tunnel bag is on the fold. The bottom of the tunnel bag has to be the strongest part, since it’s carrying the full weight of the sand, so I wanted to avoid putting a seam down there. If you want to recreate this pattern, fold a piece of tissue paper in half (along the longer side) and copy the following measurements. Draw the dotted line 1.75″ from the top for your reference (the back of the tunnel bag will be 1.75″ longer since the flap will fold over the opening at the top).
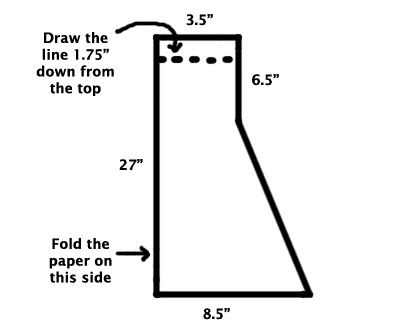
Cutting the Fabric
In preparation for cutting, I laid out the fabric so that the bottom of the pattern lines up with the fold and the dotted line aligns with one edge of the fabric. I started out using a fabric scissor, but eventually switched to a rotary knife. This was more important for the top since I’m not finishing the edges where the flap will be and wanted it to be perfectly straight (working with marine vinyl is convenient since you don’t have to hem any of the edges!).
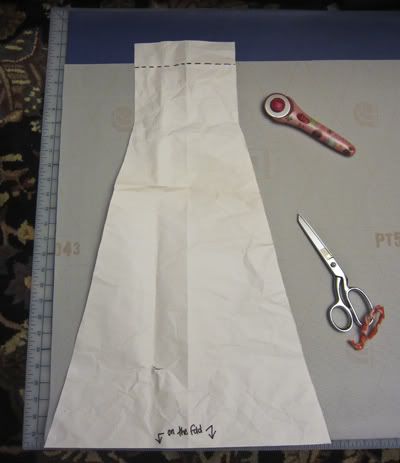
I also cut the following pieces of the nylon webbing and velcro:
- Two 17.5″ pieces of the 2″ black nylon webbing
- Four 17″ pieces of the 2″ black nylon webbing
- Two 5″ pieces of the 2″ velcro
- Four 5.5″ pieces of the 1″ velcro
Sewing the Tunnel Bag
For the sewing, I used a size 18 needle and regular polyester thread. The velcro and nylon strap (with the D-ring on) has to be sewed on first, since it would be difficult (if not impossible) to do this after sewing the whole tunnel bag together.
I put one piece of the velcro on the inside of the longer side of the fabric and the other piece on the outside of the shorter piece (only sewing through one layer of the fabric).
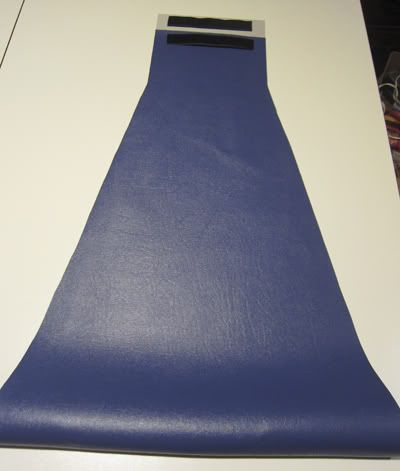
Then I sewed the strap to one side, put the D-rang on, and sewed the strap to the other side. I sewed the strap about 5″ from the top (on the longer piece of fabric, I measured from the top when the flap is folded over). The strap location should be the same on all the tunnel bags to be consistent (otherwise the strap that holds the two tunnels bags on the tunnel won’t fit).
The biggest question in terms of strength will be in the strap. I sewed a rectangle with an X in the middle and double stitched all the sides. The stitches attaching the strap to the tunnel bag holds the weight of the sand, so this will be the breaking point if these tunnels bags don’t work. Either the thread will break or the thread will cause the holes to rip into larger holes.
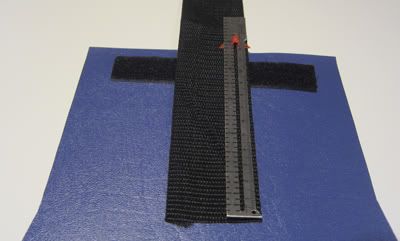
After both sides of the handle were sewn, I lined up the fabric, right side to right side, and pinned the border to keep everything lined up. I sewed each side with a half inch seam allowance.
To create the sides at the bottom, I spread each corner with the side seam exactly in the middle and drew a 2″ line on either side of the seam.
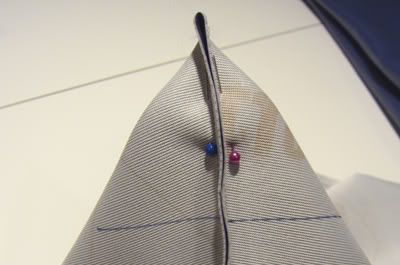
After I sewed both sides on the line, I turned the tunnel bag inside out.
Making the Connecting Strap
Because one of my tunnel bags has a different sized handle than the other three (since I was experimenting with the handle length), one of my connecting straps has to be sewn onto that tunnel bag. If I had made all the handles the same size, this wouldn’t have mattered.
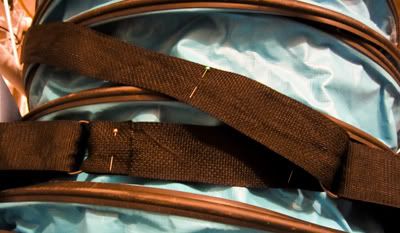
I pinned the nylon strap on one of the tunnel bags, looped it through the second one, and marked where I wanted to sew the velcro and where I wanted to cut the nylon strap.
Then I sewed one side of the nylon strap to one of the tunnel bags and sewed the 2″ velcro onto the nylon strap.
Changes for Next Time
- Design the strap so it goes all the way around the bottom of the tunnel bag. If anything gives out, it will probably be the stitches that attach the nylon strap to the tunnel bag or the fabric where the nylon strap is sewn on. I’ll see if the straps and stitches are strong enough to hold the tunnel bags long term, but this problem would probably be eliminated if I used a longer strap that went around the bottom of the tunnel bag, putting less stress on the stitches.Another alternative would be to not use nylon straps at all and make the skinny part of the tunnel bag longer to extend over the top of the tunnel and attach to the other side with velcro. But you’d need to buy a lot of marine vinyl in order to cut a continuous piece, thus making the price higher.
Tidak ada komentar:
Posting Komentar